Apply Protector

Can I apply an iPhone screen protector myself, or should I seek professional help ?
Applying an iPhone screen protector is a task that many people can do themselves with the right tools and instructions. However, it depends on your level of comfort and experience with such tasks. Here are some points to consider: Reasons to Apply Screen Protector Yourself: - Cost-effective: Doing it yourself can save you money compared to paying a professional. - Convenience: You can do it at your own pace and on your own schedule. - Satisfaction: There's a sense of accomplishment when you successfully apply a screen protector yourself. Reasons to Seek Professional Help: - Risk of Bubble and Dust: Professionals have the expertise to minimize bubbles and dust getting trapped under the protector. - Warranty or Guarantee: Some professionals offer warranties or guarantees for their work. - Time-saving: If you're not confident about doing it yourself, it might be quicker to have someone else do it. How to Apply Screen Protector Yourself: 1. Clean the Screen: Use the included wipes or a microfiber cloth to clean the screen thoroughly. 2. Peel Off the Backing: Carefully peel off the backing from the screen protector without touching the adhesive side. 3. Align and Place: Align the screen protector with the iPhone's screen and gently place it down. 4. Smooth Out Bubbles: Use a soft cloth or a squeegee to smooth out any bubbles or wrinkles. 5. Let It Sit: Allow the screen protector to set for a few hours before using the phone.

How do I clean my iPhone screen protector ?
## How to Clean Your iPhone Screen Protector Cleaning your iPhone screen protector is crucial for maintaining display clarity and touch responsiveness. Over time, dust, dirt, and fingerprints can accumulate, reducing visual quality. Here's a guide on how to clean it effectively: ### Tools Needed - Microfiber cloth - Distilled water - Mild soap or specialized cleaning solution - Soft-bristled brush (optional) - Razor blade or plastic spudger (for stubborn particles, use with caution) ### Cleaning Steps 1. **Power Off**: Turn off your iPhone to avoid accidental taps or sensitivity issues. 2. **Remove Loose Particles**: Tap the screen protector edges against a soft surface to dislodge loose particles. Use a soft-bristled brush for stubborn pieces. 3. **Wet Cloth**: Lightly dampen a microfiber cloth with distilled water. 4. **Apply Cleaning Solution**: Apply mild soap or a specialized solution to the cloth instead of directly on the screen protector. 5. **Wipe**: Gently wipe in circular motions, paying extra attention to smudges or fingerprints. 6. **Dry**: Use a dry part of the cloth to remove moisture, ensuring no water streaks remain. 7. **Deal with Stubborn Marks**: Use a cleaning pen or specialized solution for difficult marks, following product instructions. 8. **Reattach Screen Protector**: If removed for cleaning, reapply carefully, ensuring proper alignment. 9. **Power On and Test**: Turn your iPhone back on and check touch sensitivity and screen clarity. ### Precautions - Avoid harsh chemicals or abrasive materials to prevent scratches or damage. - Do not press too hard when wiping to avoid lifting or breaking the screen protector. - Consult manufacturer recommendations if unsure about using a particular cleaning product. By following these steps, you can maintain a clean and clear iPhone screen protector for an optimal viewing experience.

How long does it take for an iPhone screen protector to dry/cure ?
This guide discusses the drying time of different types of iPhone screen protectors, including plastic (PET) and tempered glass. It also provides tips on how to ensure proper curing, such as avoiding touching or exposing the phone to water or heat during the curing period. Overall, the drying time for an iPhone screen protector can range from 24-72 hours, depending on the type of material used. By following the tips provided, users can ensure that their screen protector cures properly and provides optimal protection for their device's display.

What is the best iPhone screen protector ?
The best iPhone screen protectors include OtterBox Amplify Glass, Spigen NeoFlex, ZAGG InvisibleShield, Tech21 Evo Check, and Belkin Anti-Glare. These options offer features such as durability, sensitivity, transparency, compatibility with cases and Face ID, advanced technology for military-grade protection, customizability, impact protection, bubble-free application, scratch resistance, reduced glare, and increased privacy. When choosing a screen protector, consider your specific needs and preferences to find the one that works best for you.

How often should I replace my iPhone screen protector ?
This article discusses the frequency of replacing your iPhone screen protector, which depends on various factors such as the type of screen protector used, how well you take care of it, and the environment in which you use your phone. There are mainly two types of screen protectors available for iPhones: plastic and glass. Plastic screen protectors are cheaper but offer less clarity and touch sensitivity, while glass screen protectors provide better clarity, touch sensitivity, and durability but are more expensive. The article also provides signs that indicate it's time to replace your screen protector, such as visible scratches or cracks, reduced clarity or touch sensitivity, and bubbling or lifting edges. Best practices for replacing your screen protector are also discussed, including choosing a high-quality screen protector, cleaning your iPhone screen thoroughly before applying a new screen protector, following the installation instructions carefully, and considering professional installation if you're not confident about doing it yourself.
How many times can I reuse an iPhone screen protector ?
The article provides a detailed overview of how many times an iPhone screen protector can be reused, depending on factors such as quality, type, usage conditions, cleanliness, adhesiveness, and damage. It suggests that while it is possible to reuse a screen protector under certain circumstances, it is important to consider these factors before deciding whether to reapply or replace it. The article also highlights signs that indicate it's time for a new screen protector, such as reduced clarity, loss of adhesion, and visible damage. Overall, the article emphasizes the importance of taking good care of your screen protector and replacing it when necessary to ensure the protection and appearance of your iPhone's display.
Will an iPhone screen protector prevent all scratches and cracks ?
An iPhone screen protector is a thin layer of material that is applied to the surface of an iPhone's display. It can prevent minor scratches and cracks, but it cannot prevent all damage. A high-quality screen protector can effectively prevent minor scratches from occurring on the surface of the iPhone's display. While a screen protector can help to prevent minor cracks caused by small drops or bumps, it may not be able to prevent more severe damage resulting from larger impacts or falls onto hard surfaces. Even the best screen protectors have their limitations and are not designed to withstand extreme force or repeated impacts. To maximize the lifespan of your iPhone's display, it is recommended to use a high-quality screen protector in conjunction with a protective case and to handle your device with care.
Does an iPhone screen protector affect touch sensitivity ?
The article discusses whether iPhone screen protectors affect touch sensitivity. It mentions that there are two main types of screen protectors: plastic and glass, and several factors can influence how much a screen protector affects touch sensitivity, including thickness, material, and quality. While some users report decreased touch sensitivity when using a screen protector, many others find that it has little to no effect on their device's touch responsiveness. It is recommended to choose a reputable brand and consider factors like thickness and material when selecting a screen protector to ensure the best possible user experience.

Is it necessary to remove the old screen protector before applying a new one ?
Removing an old screen protector before applying a new one is generally recommended for better adhesion, cleanliness, and accuracy. While there may be some reasons not to remove the old protector, such as time-saving and risk of damage, these can often be addressed with proper techniques and tools. Overall, removing the old screen protector ensures that your new one adheres smoothly and provides optimal protection for your device's display.
Can I use any screen protector for my iPhone model or are they specific ?
Screen protectors are indeed specific to each iPhone model due to differences in size, shape, and design elements such as notches or camera cutouts. To choose the right screen protector for your iPhone model, check compatibility, consider quality and material, look for reviews and ratings, check the installation method, and look for a warranty or return policy.
Do clear iPhone screen protectors offer the same protection as tempered glass ones ?
Both clear iPhone screen protectors and tempered glass ones aim to safeguard your device from damage. While both offer protection, they differ in material, construction, and overall capabilities. Tempered glass is generally more durable and resistant to impact and scratches but is also more expensive and challenging to install perfectly. Clear screen protectors are less expensive, easier to apply, and provide good scratch resistance but may need to be replaced more frequently. If you prioritize maximum protection for your iPhone's screen, a tempered glass screen protector would be advisable. However, if you prefer a more affordable and easily replaceable option, a clear screen protector could still serve as a decent barrier against everyday wear and tear.

Can international students apply for scholarships ?
International students can apply for various scholarships offered by universities and organizations to offset the cost of tuition, books, and living expenses. These include merit-based scholarships awarded based on academic or leadership skills, need-based scholarships considering financial situation, athletic scholarships, diversity scholarships, and first-generation college student scholarships. External organizations like the Fulbright Program and Rotary International also provide opportunities. To apply, research available scholarships, review requirements, prepare application materials, apply early and regularly, and seek additional funding sources.
Can I use a case with an iPhone screen protector ?
Using a case with an iPhone screen protector is highly recommended for maximum protection. It enhances protection, extends the device's lifespan, and is cost-effective. When choosing, consider compatibility, material, design, and brand reputation.

What are the benefits of having an iPhone screen protector ?
The iPhone Screen Protector offers protection from scratches and dings, reduces glare and fingerprints, improves privacy, is easy to install/remove, and is cost-effective.
Will a screen protector affect my iPhone's battery life ?
A screen protector does not directly affect an iPhone's battery life, but certain types may have indirect effects. To optimize battery life, users should adjust screen brightness, turn off unnecessary features, use power-saving modes, regularly update software, monitor app usage, maintain proper storage space, replace old batteries, and seek professional help when needed.

Are expensive iPhone screen protectors worth it ?
When it comes to protecting your iPhone's screen, there are a plethora of options available in the market. One of the most common types of screen protectors is the tempered glass screen protector. These screen protectors are made from a special type of glass that is designed to be more durable and resistant to cracks and scratches than regular glass. However, they can be quite expensive compared to other types of screen protectors. One of the main advantages of expensive iPhone screen protectors is their durability. These screen protectors are made from high-quality materials that are designed to withstand impacts and resist scratches. Another advantage of expensive iPhone screen protectors is their clarity. These screen protectors are designed to be crystal clear, which means that they won't interfere with your ability to see the display on your iPhone. Finally, expensive iPhone screen protectors are also designed to be highly sensitive to touch, which means that you won't experience any lag or delay when using your iPhone's touchscreen. The biggest downside of expensive iPhone screen protectors is their cost. These screen protectors can be quite pricey compared to other types of screen protectors, which may not be feasible for everyone's budget. Another potential downside of expensive iPhone screen protectors is their installation process. Some of these screen protectors can be difficult to install properly, which may require some practice or professional help. Finally, even the most expensive iPhone screen protectors have a limited lifespan. Over time, they may become scratched or damaged, which means that you'll need to replace them periodically. In conclusion, whether or not expensive iPhone screen protectors are worth it depends on several factors. If you value durability, clarity, and touch sensitivity above all else, then an expensive screen protector may be worth the investment. However, if you're on a tight budget or don't mind sacrificing some of those features for a lower price point, then a cheaper alternative may be more suitable for you. Ultimately, the decision comes down to personal preference and priorities.
How do I create a simple, everyday makeup look that's also fast to do ?
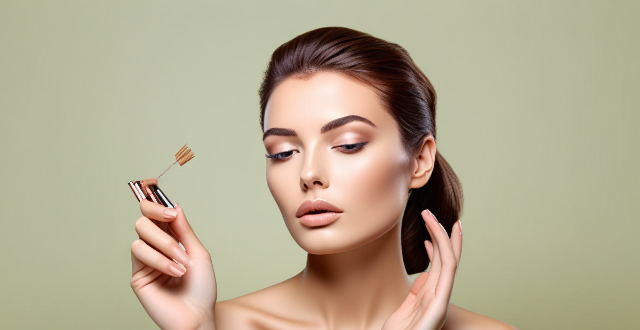
Creating a simple, everyday makeup look that is also quick to apply involves several steps and products. Start with clean skin by washing your face with a gentle cleanser and applying a lightweight moisturizer. Prime your face with a primer to create a base for your makeup. Apply foundation evenly across your face using a makeup sponge or foundation brush. Use concealer to cover any blemishes or dark circles under your eyes, and add a bit of highlighter to the high points of your face. Add some color to your cheeks with blush and bronzer. For eye makeup, use a neutral eyeshadow close to your skin tone, curl your lashes and apply mascara, and fill in your eyebrows with a pencil or powder that matches your brow color. Finish with a lip balm or tinted lip balm/light lipstick. Finally, use a setting spray to lock in your makeup and ensure it lasts throughout the day. By following these steps, you can create a simple, everyday makeup look that is both fast to do and enhances your natural beauty.

How should I handle a cut that is bleeding profusely ?
How to Handle a Cut that is Bleeding Profusely: Stop the Bleeding: Apply direct pressure on the wound using a clean cloth or bandage. Elevate the injured area above your heart level if possible. If the bleeding doesn't stop after 10 minutes, apply more pressure and elevate it higher. Clean the Wound: Once the bleeding has stopped, gently clean around the wound with mild soap and water. Avoid getting any soap into the wound itself as it can cause irritation. Pat dry with a clean towel. Apply Antibiotic Ointment: Apply a thin layer of antibiotic ointment over the wound to prevent infection. Cover with a sterile bandage or gauze. Change Dressing Regularly: Change the dressing regularly to keep the wound clean and dry. Check for any signs of infection such as redness, swelling, warmth, or pus. Seek Medical Attention if Needed: If the bleeding does not stop after 20 minutes of applying pressure, seek medical attention immediately. If there are any signs of infection, such as fever, increased pain, or red streaks leading from the wound, see a doctor.

Can I apply for a tourist visa online ?
Applying for a tourist visa online is convenient and efficient, with requirements including a valid passport and proof of funds. The process involves filling out an electronic form and uploading supporting documents. Payment is typically required through a secure gateway, and approval may require additional documentation or an interview. Processing times vary, so it's important to apply well in advance of travel.

Are there any quick and easy makeup tricks for everyday use ?
Makeup can be a fun and creative way to express yourself, but it can also be time-consuming. If you're looking for some quick and easy makeup tricks that you can use in your everyday life, here are some tips: Highlight Your Features: Use concealer to cover blemishes: Concealer is a great way to quickly hide any blemishes or dark circles under your eyes. Simply apply a small amount of concealer to the affected area and blend it out with your fingers or a brush. Apply blush to add color to your cheeks: Blush can help give your face a healthy glow. Smile and apply blush to the apples of your cheeks, then blend it out towards your ears. Define your eyebrows: Well-groomed eyebrows can frame your face and make you look more put together. Use an eyebrow pencil or powder to fill in any sparse areas and create a natural-looking shape. Simplify Your Eye Makeup: Use eyeliner instead of eyeshadow: If you don't have time for a full eyeshadow look, try using eyeliner instead. A thin line along your upper lash line can make your eyes pop without taking up too much time. Curl your lashes: Curling your lashes can make them look longer and fuller without the need for mascara. Simply hold the curler at the base of your lashes and press gently for a few seconds before releasing. Apply mascara only to the top lashes: If you're really pressed for time, skip the bottom lashes altogether and focus on just the top ones. This will save you time while still giving you a polished look. Streamline Your Lip Routine: Choose a long-lasting lipstick: A good quality lipstick that stays put throughout the day can save you from having to reapply it constantly. Look for one with staying power that won't smudge or fade easily. Use lip balm as a base: Applying lip balm before your lipstick can help keep your lips moisturized and prevent the color from bleeding outside of your lip line. Skip the lip liner: While lip liner can help define the shape of your lips, it's not necessary if you're going for a more natural look. Simply apply your lipstick directly to your lips and blend it out with your finger or a brush.

How can I get rid of grease stains on my favorite shirt ?
Removing grease stains from your favorite shirt can be a daunting task, but with the right techniques and products, it is possible to get rid of these unsightly blemishes. Here are some steps you can follow to remove grease stains from your favorite shirt: 1. Act Quickly: The first step in removing grease stains is to act quickly. The longer the stain sits on your shirt, the harder it will be to remove. As soon as you notice the stain, take action to remove it. 2. Blot the Stain: Use a clean cloth or paper towel to blot the stain gently. Do not rub the stain aggressively, as this can spread the grease further into the fabric. Instead, apply gentle pressure to absorb as much of the grease as possible. 3. Apply a Stain Remover: Apply a stain remover specifically designed for grease stains. You can use a commercial stain remover or make your own by mixing equal parts of dish soap and white vinegar. Apply the solution directly to the stain and let it sit for 5-10 minutes. 4. Wash the Shirt: After allowing the stain remover to sit on the stain, wash the shirt in cold water using a laundry detergent that contains enzymes. Enzymes are effective at breaking down grease and oil, making it easier to remove the stain. Avoid using hot water, as this can set the stain permanently. 5. Check the Stain: Before drying the shirt, check to see if the stain has been removed. If the stain is still visible, repeat steps 3 and 4 until the stain is completely gone. Do not dry the shirt until the stain is completely removed, as heat can set the stain permanently. 6. Dry the Shirt: Once the stain is removed, dry the shirt according to the care label instructions. If you are unsure about the care instructions, it is best to air dry the shirt or use a low heat setting on your dryer. In conclusion, removing grease stains from your favorite shirt requires quick action, the right products, and patience. By following these steps, you can effectively remove grease stains and keep your favorite shirt looking its best.

How do I apply for a student loan ?
This text provides a comprehensive guide on how to apply for a student loan. It outlines nine steps, including determining needs, researching loan options, checking eligibility requirements, gathering documents, completing and submitting the application form, waiting for approval, signing promissory notes and loan agreements, and receiving disbursement of loan funds. The guide emphasizes the importance of understanding different loan options and their terms and conditions before applying. It also highlights the need to gather all necessary documents and provide accurate information in the application form. Overall, this text is an essential resource for students seeking financial assistance for their education.

How can I improve my reading comprehension skills ?
Improving reading comprehension skills requires a consistent effort and the use of various strategies. Here are some key points to help you enhance your ability to understand written texts: 1. Read Regularly - Establish a routine, varying genres and authors. 2. Active Reading - Annotate by highlighting or making notes. - Ask questions before and during reading. 3. Summarize and Paraphrase - Write summaries of sections in your own words. - Create mental images like diagrams or stories. 4. Discuss and Apply - Join book clubs or study groups for discussions. - Apply what you read to real-life situations. 5. Utilize Tools and Resources - Use dictionaries, thesauruses, and research background information. - Access online courses and interactive tools. By integrating these strategies into your daily routine, you can improve your reading comprehension skills over time.

How do I apply for a scholarship ?
The text provides a step-by-step guide on how to apply for a scholarship, emphasizing the importance of research, eligibility criteria, required documents, application form completion, essay writing, and submission. It stresses the need for accuracy, thoroughness, and timeliness in the application process.

Can I apply for multiple scholarships at the same time ?
Applying for multiple scholarships at the same time is allowed and encouraged to increase financial assistance chances. It's important to research each scholarship's requirements, deadlines, and customize applications accordingly. Tips include creating a spreadsheet, seeking help, and prioritizing applications based on various factors.

How do I apply mathematical formulas to real-world problems ?
The article discusses steps to apply mathematical formulas to real-world problems. It emphasizes understanding context, gathering accurate data, choosing the right formula, plugging in data, and interpreting results. The process is crucial for solving complex issues in various fields.

Do buy one get one free deals apply to sale items as well ?
Buy one get one free (BOGO) deals are a popular marketing strategy used by retailers to boost sales. These offers can be tempting, but it's important to understand the terms and conditions associated with them. In this article, we will explore whether BOGO deals apply to sale items as well. Before diving into the specifics of sale items, let's first clarify what BOGO deals entail. Typically, a BOGO deal allows you to purchase one item at full price and receive another item of equal or lesser value for free. There may be restrictions on which products are eligible, so it's essential to read the fine print before making a purchase. Now, let's address the main question: do BOGO deals apply to sale items as well? The answer is that it depends on the retailer's policies. Some retailers may include sale items in their BOGO promotions, while others may not. Here are some factors to consider: - Retailer Policy: Each retailer has its own policy regarding BOGO deals and sale items. It's crucial to check the terms and conditions of the offer to see if sale items are included. - Promotion Details: Pay attention to the details of the promotion. Some BOGO deals may specifically state that they are only applicable to regular-priced items, excluding sale items. - Timing: If a BOGO deal overlaps with a sale event, it's possible that both discounts could be applied. However, this is not guaranteed and should be confirmed with the retailer. If you're looking to take advantage of BOGO deals, here are some tips to help you maximize your savings: - Plan Ahead: Keep an eye out for upcoming sales events and BOGO promotions. This way, you can plan your purchases accordingly and potentially stack multiple discounts. - Read Reviews: Before making a purchase, read reviews from other customers who have taken advantage of BOGO deals. This can give you insight into which products are worth buying and any potential pitfalls to avoid. - Compare Prices: Even with a BOGO deal, it's still important to compare prices across different retailers. Sometimes, a sale item at one store may be cheaper than a BOGO deal at another store. In conclusion, whether BOGO deals apply to sale items depends on the retailer's policies and the specific details of the promotion. To make the most of these offers, it's essential to read the fine print, plan ahead, and compare prices across different retailers. By following these tips, you can maximize your savings and enjoy the benefits of BOGO deals without breaking the bank.

How can I apply minimalist principles for quick and effective home organization ?
Minimalism is about intentional living and promoting clarity, calmness, and efficiency in your home. To apply minimalist principles for quick and effective organization, start by identifying your priorities through listing necessities and assessing functionality. Simplify your space by removing unnecessary items and creating open areas. Categorize and contain items by grouping them together and using clear labeling for easy accessibility. Streamline routines with daily maintenance and simplifying tasks through automation or batch processing. Regularly evaluate and adjust your organizational systems as needs change, embracing quality over quantity and mindful acquisition. Achieving an organized home reflects a purposeful lifestyle supporting well-being and function.