Stain Rust
Is it possible to remove rust stains from fabric without damaging it ?
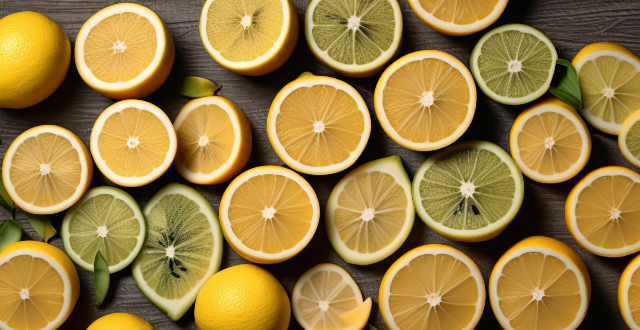
Rust stains can be removed from fabric using natural ingredients such as lemon juice and salt, vinegar and baking soda, or hydrogen peroxide. These methods are effective in breaking down the rust and lifting it away from the fabric without causing damage. It is important to test any cleaning solution on a small area of the fabric before applying it to the stain and to allow enough time for each method to work. If one method does not work, try another one until the stain is completely removed. After removing the rust stain, wash the fabric according to its care instructions to remove any residual cleaning solution and prevent further damage.
Can vinegar be used as a natural stain remover for clothes ?
Vinegar can be used as a natural stain remover for clothes due to its acidic properties and antimicrobial benefits. It is effective in removing various types of stains, including grass, blood, wine, coffee, tea, and sweat. To use vinegar as a stain remover, apply it directly to the stain, let it sit for 5-10 minutes, scrub gently, rinse with cold water, and wash according to care label instructions. Vinegar is cost-effective, environmentally friendly, and versatile. However, it should be tested on an inconspicuous area before use and avoided on delicate fabrics.
Is there a natural way to clean stains off my clothes ?
Removing stains from clothes can be challenging, but natural methods like using white vinegar, baking soda, lemon juice, hydrogen peroxide, and salt can effectively clean various types of stains. These techniques are gentle on the environment and clothing.
How do I remove stubborn stains from carpets and upholstery ?
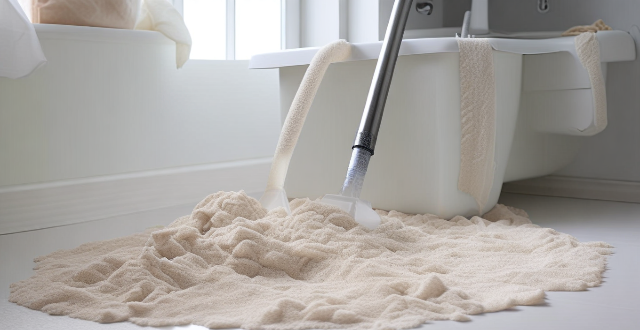
Removing stubborn stains from carpets and upholstery requires identifying the type of stain, acting quickly, pre-treating, gently blotting or scrubbing, rinsing and drying thoroughly, and possibly seeking professional help. Testing cleaning solutions on an inconspicuous area before use is recommended to avoid damage or discoloration.

What is the most effective method for removing wine stains from fabric ?
The most effective method for removing wine stains from fabric involves acting quickly, blotting the stain, applying salt and a stain remover, rinsing with cold water, washing the fabric, and checking the stain before drying.
How do I remove ink or pen marks from my clothing ?
Removing ink or pen marks from clothing can be challenging, but with the right techniques, it's often possible. Identify the type of ink, act quickly to blot wet ink, pre-treat the stain using appropriate methods for water-based, oil-based, or permanent marker ink, machine wash following care label instructions, check the stain before drying, and dry according to care label instructions. Always test cleaning solutions on an inconspicuous area first and consider professional cleaners for delicate or valuable garments. Patience and persistence are key when dealing with stubborn stains.

How can I get rid of grease stains on my favorite shirt ?
Removing grease stains from your favorite shirt can be a daunting task, but with the right techniques and products, it is possible to get rid of these unsightly blemishes. Here are some steps you can follow to remove grease stains from your favorite shirt: 1. Act Quickly: The first step in removing grease stains is to act quickly. The longer the stain sits on your shirt, the harder it will be to remove. As soon as you notice the stain, take action to remove it. 2. Blot the Stain: Use a clean cloth or paper towel to blot the stain gently. Do not rub the stain aggressively, as this can spread the grease further into the fabric. Instead, apply gentle pressure to absorb as much of the grease as possible. 3. Apply a Stain Remover: Apply a stain remover specifically designed for grease stains. You can use a commercial stain remover or make your own by mixing equal parts of dish soap and white vinegar. Apply the solution directly to the stain and let it sit for 5-10 minutes. 4. Wash the Shirt: After allowing the stain remover to sit on the stain, wash the shirt in cold water using a laundry detergent that contains enzymes. Enzymes are effective at breaking down grease and oil, making it easier to remove the stain. Avoid using hot water, as this can set the stain permanently. 5. Check the Stain: Before drying the shirt, check to see if the stain has been removed. If the stain is still visible, repeat steps 3 and 4 until the stain is completely gone. Do not dry the shirt until the stain is completely removed, as heat can set the stain permanently. 6. Dry the Shirt: Once the stain is removed, dry the shirt according to the care label instructions. If you are unsure about the care instructions, it is best to air dry the shirt or use a low heat setting on your dryer. In conclusion, removing grease stains from your favorite shirt requires quick action, the right products, and patience. By following these steps, you can effectively remove grease stains and keep your favorite shirt looking its best.

What's the best way to treat set-in stains on white clothing ?
Set-in stains on white clothing can be stubborn and difficult to remove, but with the right approach, they can often be successfully treated. Here are some steps to follow: 1. Identify the Stain: First, identify the type of stain you are dealing with. Different stains require different treatments. For example, protein stains like blood or grass require a different approach than tannin stains like tea or coffee. 2. Act Quickly: The sooner you treat a stain, the easier it is to remove. If the stain is still wet, blot it with a clean cloth or paper towel to remove as much of the substance as possible. 3. Pre-Treat the Stain: Before washing, pre-treat the stain with a suitable stain remover. Choose a product that is safe for use on white clothing and apply it directly to the stain following the instructions on the label. Let it sit for the recommended time. 4. Wash in Hot Water: Wash the garment in hot water, using a detergent that is designed for white clothing. Check the care label on your garment to ensure that it can be washed in hot water. If not, use the warmest water recommended. 5. Use Chlorine Bleach if Necessary: If the stain persists after washing, you can use chlorine bleach. However, be sure to check the care label on your garment first. Some fabrics may not be able to handle bleach. If your garment is made of a material that can be safely bleached, add chlorine bleach to the wash cycle according to the package instructions. 6. Rinse Thoroughly: Rinse the garment thoroughly to remove all traces of the stain and any cleaning products used. 7. Dry and Check: Dry the garment and check to see if the stain has been removed. If not, repeat the process before drying again. Once the stain is gone, you can dry the garment as usual. In conclusion, treating set-in stains on white clothing requires patience and persistence. By identifying the stain, acting quickly, pre-treating, washing in hot water, using chlorine bleach if necessary, rinsing thoroughly, drying, and checking, you can often successfully remove even the most stubborn stains.
What are the best ways to remove stains from clothes ?
Removing stains from clothes requires pre-treatment, stain removers, home remedies, laundry detergent, and sometimes professional dry cleaning. Pre-treating the stain by blotting it with a clean cloth or paper towel is crucial. Commercial stain removers can be effective for various stains, while home remedies like baking soda and vinegar, hydrogen peroxide, and lemon juice can tackle stubborn stains. Applying laundry detergent directly to the stain and washing it afterward can also work. For delicate fabrics or persistent stains, professional dry cleaning may be necessary. By following these steps, most types of stains can be effectively removed from clothing.

Are there any DIY tricks for getting out tough stains like blood or grass ?
When it comes to removing tough stains like blood or grass, there are several DIY tricks you can try before resorting to professional cleaning services. These include soaking the stained area in cold water, applying hydrogen peroxide directly to the stain, creating a paste with salt and cold water, applying white vinegar directly to the stain, mixing lemon juice with salt to create a paste, and mixing dish soap with baking soda to create a paste. It is important to always test any solution on an inconspicuous area of the fabric first to ensure it doesn't cause damage or discoloration. If these DIY methods fail, consider seeking professional help from a cleaning service.

What are some signs that a fire extinguisher may need to be replaced ?
Fire extinguishers are crucial safety equipment that need to be in good condition. Signs that indicate a fire extinguisher needs replacement include: 1. **Pressure Indicator**: If the indicator is in the red zone or below, it needs recharging or replacement. 2. **Expiration Date**: Replace immediately if the extinguisher has passed its expiration date. 3. **Corrosion and Rust**: Corrosion or rust compromises the integrity of the extinguisher. 4. **Leaking or Discharging**: Indicates a problem with the seal or valve, requiring replacement. 5. **Damage or Wear and Tear**: Replace if there are dents, cracks, or missing parts due to damage or wear. 6. **Manufacturer's Recommendations**: Follow the manufacturer's guidelines for optimal performance and safety.
How can I prevent stains from setting into my laundry ?
To prevent stains from setting into laundry, promptlyTo prevent stains from setting into laundry, promptly, sort clothes by color and use cold water for washing, launder immediately after wearing, and avoid overloading the washer.

What are some effective strategies for doing laundry in less time ?
Effective strategies for doing laundry in less time include planning ahead, using a larger capacity washer, pretreating stains, using cold water and high-efficiency detergent, using the quick wash cycle, and hanging clothes to dry. These strategies can save time, energy, and money while still getting clothes clean and fresh.

What are the best natural cleaning solutions for my home ?
Natural cleaning solutions are a great way to keep your home clean and fresh without exposing yourself or your family to harsh chemicals. Some of the best natural cleaning solutions for your home include white vinegar, baking soda, lemon juice, and castile soap. White vinegar removes stains, deodorizes surfaces, cuts through grease, and cleans windows without leaving streaks. Baking soda deodorizes fabrics, removes stains, cleans and polishes silverware and jewelry, and freshens drains and garbage disposals. Lemon juice dissolves soap scum and hard water deposits, brightens laundry, deodorizes kitchen surfaces, and removes rust stains. Castile soap cleans floors, walls, dishes, pots and pans, skin, and hair. By using these natural cleaning solutions, you can keep your home clean and fresh while reducing your exposure to harmful chemicals.

How often should I replace my iPhone case to maintain its protective qualities ?
The article discusses the importance of replacing iPhone cases to maintain their protective qualities and suggests different intervals for various types of cases based on signs of wear and tear.

How can I streamline my laundry process to be more productive ?
Streamlining your laundry process can save time and reduce stress. Here are some tips to help you be more productive with your laundry tasks: 1. **Preparation Phase**: - Gather all necessary laundry supplies like detergent, fabric softener, and stain removers. - Sort clothes by color and fabric type. - Establish a routine for doing laundry and use proper storage for dirty and clean clothes. 2. **Washing Cycle**: - Avoid overloading the washing machine and separate heavy items from delicates. - Choose the appropriate wash cycle based on soil levels and adjust water temperature for energy efficiency. 3. **Drying Process**: - Dry similar items together and clean the lint screen after every use to improve dryer efficiency. - Use timed drying to avoid overdrying and fold clothes immediately to prevent wrinkles. 4. **Organization and Maintenance**: - Fold or hang clothes immediately after drying to reduce wrinkling and put away clean clothes to avoid clutter. - Keep the laundry area clean by wiping down surfaces after each use and regularly cleaning the washing and drying machines. By implementing these steps, you can make your laundry process more efficient, saving time and effort in the long run.

How do you maintain and care for a permanent magnet motor to extend its lifespan ?
Permanent magnet motors are widely used in various industries due to their high efficiency, power density, and reliability. However, proper maintenance and care are essential to extend the lifespan of these motors. Here are some tips on how to maintain and care for a permanent magnet motor: - Regular cleaning, lubrication, thermal management, electrical maintenance, mechanical maintenance, environmental considerations, and preventive maintenance schedule are all important aspects of maintaining a permanent magnet motor. - External and internal cleaning should be done regularly to keep the motor clean from dust, dirt, and debris. Lubrication of bearings and gearbox (if any) should be done according to the manufacturer's recommendations. - Thermal management includes ensuring that the cooling system is functioning properly and monitoring the temperature of the motor during operation. Overheating can cause damage to the magnets and other components. - Electrical maintenance involves checking all electrical connections periodically to ensure they are secure and free from corrosion. Insulation resistance should also be tested periodically to detect any potential issues before they become serious problems. - Mechanical maintenance includes ensuring that the motor shaft is properly aligned with the load and performing vibration analysis periodically to identify any mechanical issues such as imbalance or loose parts. - Environmental considerations involve storing and operating the motor in a dry environment to prevent rust and corrosion. Protection from harsh environmental conditions such as extreme temperatures, chemicals, or moisture should also be considered. - A preventive maintenance schedule should be created based on the manufacturer's recommendations and specific application requirements. Regular inspections and prompt attention to any issues will save time and money in the long run by preventing more significant problems from occurring.

How do I achieve a professional-looking makeup job in a hurry ?
Achieving a professional-looking makeup job in a hurry is possible with the right techniques and products. Prepare your skin by cleansing, moisturizing, and priming. Choose the right foundation formula and apply it with a makeup sponge or dense brush for even coverage. Contour and highlight to define facial structure and add a glowing effect. Add color with blush, bronzer, eyeshadow, and eyeliner, and choose a long-lasting lipstick or stain. Set your makeup with setting powder and spray, and carry key items for quick touch-ups. Practice makes perfect, so streamline your routine and find what works best for you when you're in a hurry.

What are some quick and easy ways to get my clothes clean ?
Here are some quick and easy ways to keep your wardrobe fresh and clean: 1. Spot Cleaning: For small stains or spills, dampen a cloth with water or a mild detergent and gently blot the affected area until the stain is removed. 2. Hand Washing: Fill a sink or basin with warm water and add a small amount of gentle detergent. Gently agitate clothing items in the water, then rinse thoroughly and hang to dry. 3. Machine Washing: Sort clothes by color and fabric type before washing. Use a gentle cycle and cold water for delicate items, and warmer water for more durable fabrics. 4. Dry Cleaning: Check care labels on garments made from silk, wool, or other delicate materials. If dry cleaning is recommended, take clothes to a professional dry cleaner. 5. Air Drying: Hang clothes outside on a clothesline or indoors on a drying rack to save energy and prolong their lifespan. This method also helps eliminate wrinkles and static cling. 6. Steaming: Hang clothes in a steamy bathroom after a shower or use a handheld garment steamer to remove wrinkles and odors. By incorporating these methods into your routine, you can keep your wardrobe looking its best without spending hours on laundry day.
What are the best ways to wash clothes quickly and effectively ?
This article discusses the best ways to wash clothes quickly and effectively. It covers preparation steps such as sorting clothes, pre-treating stains, and checking pockets. It also explains how to set up a washing machine with the right cycle, warm water, and detergent. Handwashing clothes is another option that involves soaking clothes in warm water with detergent, scrubbing gently, rinsing thoroughly, and hanging to dry. After washing, drying clothes properly is important to prevent wrinkles and damage. Overall, following these steps can help you save time and keep your clothes clean and fresh.