Turn Apple

How do I use AirDrop to share files between Apple devices ?
AirDrop allows sharing files between Apple devices. To use it, turn on Wi-Fi and Bluetooth, open the Control Center, turn on AirDrop, share the file, accept the transfer, and save the file.

How do I turn off automatic updates for apps on my Apple devices ?
Turning off automatic updates for apps on your Apple devices is a simple process that can be done through the device settings. Here's how to disable automatic app updates on iPhone, iPad, and Mac: **On an iPhone or iPad:** 1. Open the Settings App. 2. Navigate to the iTunes & App Store settings. 3. Toggle off Automatic Downloads under "Apps." 4. Confirm your choice in the pop-up. 5. Optionally toggle off App Updates to manually update all apps. **On a Mac:** 1. Open System Preferences. 2. Access the App Store settings. 3. Adjust Automatic Update settings by unchecking "Automatically check for updates" and "Install app updates." 4. Close the System Preferences to save changes. Disabling automatic updates gives you more control over when apps are updated but requires manual checking for updates to keep apps up-to-date and secure.
How do I find lost or stolen Apple devices using Find My iPhone ?
Losing an Apple device or having it stolen can be a distressing experience, but with the Find My iPhone feature, you can locate your missing device, protect your data, and even recover your device if it's lost or stolen. To use Find My iPhone to find your lost or stolen Apple devices, enable Find My iPhone on your Apple device (iPhone, iPad, iPod touch, or Mac) and keep your software up to date. If you lose your device, sign in to Find My iPhone on iCloud.com/find, view its location on the map, use Lost Mode to lock your device with a passcode, display a custom message with your contact info on the Lock screen, and report your lost or stolen device to local law enforcement if needed. If you think your device is gone for good, you can erase all data from it remotely to protect your personal information. If you find your lost device, turn off Lost Mode and reactivate your device by entering your Apple ID and password if prompted. Use Family Sharing to locate any family member’s device from your personal device, keep your battery charged, and update your contact information in your device settings and in Find My iPhone so whoever finds your device can reach you. By following these steps, you can maximize your chances of finding your lost or stolen Apple devices and protect your personal information in case of loss or theft.

How do I charge my Apple Watch without a charger ?
This text provides a step-by-step guide on how to charge an Apple Watch without its designated charger. It suggests several alternative methods including the use of a portable power bank, a computer or laptop, a car charger, and a wireless charging pad for later models of the Apple Watch. Despite these options, it is recommended to use the dedicated Apple Watch charger for optimal speed and convenience.

How do I troubleshoot problems with Bluetooth sync between my Mac and my Apple Watch ?
Troubleshooting Bluetooth Sync Issues between Mac and Apple Watch If you're experiencing problems with Bluetooth sync between your Mac and your Apple Watch, there are several steps you can take to troubleshoot the issue. Here's a detailed guide on how to do so: Check Your Devices' Bluetooth Settings First, ensure that both your Mac and Apple Watch have Bluetooth enabled and are in range of each other. To do this, follow these steps: - On Your Mac: - Click on the Apple menu in the top left corner of your screen. - Select System Preferences. - Click on Bluetooth. - Make sure that Bluetooth is turned on and that your Apple Watch appears in the list of devices. - On Your Apple Watch: - Open the Settings app on your watch. - Tap on Bluetooth. - Ensure that Bluetooth is turned on. Restart Both Devices Sometimes, simply restarting both your Mac and Apple Watch can resolve sync issues. Here's how to do it: - Restart Your Mac: - Click on the Apple menu in the top left corner of your screen. - Select Restart. - Restart Your Apple Watch: - Press and hold the side button until the power off slider appears. - Drag the slider to turn off your watch. - Once it's off, press and hold the side button again until you see the Apple logo to turn it back on. Unpair and Re-Pair Your Devices If restarting doesn't work, try unpairing and re-pairing your devices. Here's how: - Unpair Your Apple Watch from Your iPhone: - On your iPhone, open the Watch app. - Tap on My Watch, then tap on All Watches at the top of the screen. - Tap on the info button next to your watch, then tap Unpair Apple Watch. - Unpair Your Apple Watch from Your Mac: - On your Mac, click on the Apple menu in the top left corner of your screen. - Select System Preferences, then click on Bluetooth. - Hover over your Apple Watch in the list of devices and click on the 'x' that appears. - Re-Pair Your Devices: - Put your Apple Watch back into pairing mode by pressing and holding the side button until you see the pairing screen. - Follow the prompts on your iPhone and Mac to re-pair your devices. Update Your Software Make sure that your Mac, iPhone, and Apple Watch are all running the latest software updates. To do this: - On Your Mac: - Click on the Apple menu in the top left corner of your screen. - Select About This Mac, then click on Software Update. - On Your iPhone: - Open the Settings app, then tap on General. - Tap on Software Update. - On Your Apple Watch: - Open the Settings app on your watch, then tap on General. - Tap on Software Update. Contact Apple Support If none of the above steps work, it may be time to contact Apple Support for further assistance. They can help diagnose and resolve more complex sync issues between your Mac and Apple Watch.

How do I troubleshoot common issues with my iPhone without visiting an Apple Store ?
This text provides a guide to troubleshooting common issues with iPhones, such as battery drain, Wi-Fi connectivity problems, app crashes, and slow performance. It suggests steps like checking battery usage, reducing screen brightness, turning off unnecessary features, restarting the device, forgetting and reconnecting to Wi-Fi networks, resetting network settings, updating apps, clearing app cache, reinstalling apps, closing unused apps, freeing up storage space, and resetting all settings. If these steps do not resolve the issues, it recommends contacting Apple Support or visiting an Apple Store for further assistance.

Can I use Apple Music without an Apple device ?
The text discusses the availability of Apple Music across various platforms, including Windows, Android devices, web players, and smart TVs and streaming devices. It highlights the key features available on each platform and concludes that users don't need an Apple device to enjoy Apple Music.

What settings do I need to change to ensure seamless syncing of my Apple Notes across all my devices ?
Ensure seamless syncing of Apple Notes across devices by verifying iCloud account, enabling iCloud sync for Notes, updating software versions, checking network connection, avoiding conflicting changes, using same region and language settings, troubleshooting with iCloud website, and contacting Apple Support if needed.

How do I create an Apple ID ?
Create an Apple ID to access services like the App Store, Apple Music, iCloud and more.

What are the features of Apple Music ?
Apple Music is a streaming music service with numerous features, including a huge song library, personalized playlists, radio stations, lyrics support, downloadable content, integration with other Apple services, family sharing, student discounts, high-quality audio, and artist showcase.

Can I swim with my Apple Watch on ?
The Apple Watch is water-resistant, but only the Series 4 and later models are suitable for swimming. When swimming with an Apple Watch, close the crown tightly, avoid dropping it, rinse it afterward, and use the Swim Workout app for accurate tracking.

What should I do if my Apple ID has been hacked ?
If your Apple ID has been hacked, change your password, contact Apple Support, check for unauthorized activity, update security settings, and be cautious of phishing scams.

Are there any fees associated with using Apple Pay ?
There are no fees associated with using Apple Pay for purchases, transfers, or international transactions. Apple Pay offers robust security features and can be used conveniently in-person and online without additional costs.

How do I set up Apple Pay on my iPhone or Apple Watch ?
Apple Pay is a mobile payment service that allows users to make secure purchases in person, in iOS apps, and on the web. To set up Apple Pay on an iPhone, open the Wallet app, tap the plus sign, choose "Continue" and follow the prompts to add a credit or debit card. After verifying your information with your bank or card issuer, you can start using Apple Pay for contactless payments at supported merchants and within apps. For the Apple Watch, open the Apple Watch app on your iPhone, tap "My Watch," then tap "Wallet & Apple Pay," tap "Add Card," and follow the prompts to add a card. After setting up Apple Pay, enjoy the convenience of quick and secure payments wherever Apple Pay is accepted.

Where can I use Apple Pay ?
Apple Pay is a mobile payment and digital wallet service by Apple Inc. that allows users to make secure purchases in person, in iOS apps, and on the web using Safari. It is designed to replace physical credit and debit cards by provisioning their information on Apple Pay-compatible devices. You can use Apple Pay for in-person transactions at any store or merchant that accepts contactless payments. Look for the NFC payment symbol or the Apple Pay logo to ensure that your transaction will be processed smoothly. You can also use Apple Pay within iOS apps during checkout, which saves you the trouble of entering your card details each time you make a purchase. Additionally, if you're shopping on the web using Safari on your iPhone or iPad, you can complete purchases with Apple Pay on participating websites.

Can I use Apple Pay internationally ?
Apple Pay is available in over 20 countries and regions worldwide, allowing users to make convenient and secure payments using their iPhone, Apple Watch, or iPad. To use Apple Pay internationally, users need to ensure their device supports it and set up a payment method accepted in the country they are visiting. Using Apple Pay offers benefits such as convenience, security, speed, and compatibility with popular apps and services around the world.
How does Apple Pay work ?
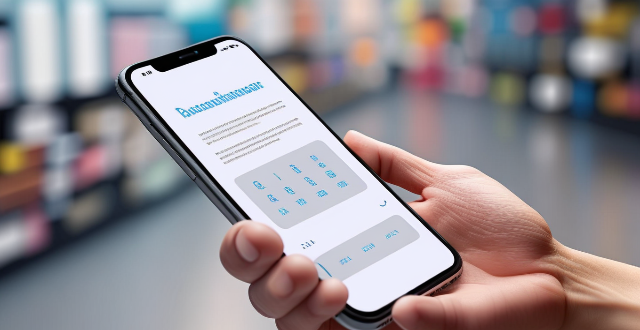
Apple Pay is a mobile payment and digital wallet service that allows users to make secure purchases using their Apple devices. To set up Apple Pay, users add their credit or debit cards to the Wallet app on their iPhone and verify their identity with their bank or card issuer. When using Apple Pay in stores, users can hold their iPhone or iPad near the contactless reader and confirm the payment using Touch ID or Face ID. With Apple Watch, users double-click the side button and bring their watch close to the contactless reader. Within apps and on the web, users can select Apple Pay as their payment method during checkout and confirm their purchase using Touch ID or Face ID. Apple Pay ensures security and privacy by using a device-specific number and unique transaction code for each payment, and transactions are authorized with Face ID or Touch ID. Apple Pay is compatible with various Apple devices, including iPhone models with Face ID and Touch ID, Apple Watch models, iPad Pro, iPad Air, iPad, and iPad mini models with Touch ID or Face ID, and Mac models with Touch ID.

What happens to my Apple ID after cancelling an Apple service or product subscription ?
Cancelling an Apple service or product subscription does not affect your Apple ID account. Your Apple ID remains active and you can continue to use it for other services and products offered by Apple. However, the specific service or product that you cancelled will no longer be available to you.

What is the pricing for the new Apple products announced at the event ?
The text lists the pricing for various new Apple products, including iPhones, iPads, Apple Watches, AirPods, and HomePod mini. Prices range from $179 to $1,099 depending on the product and model.

Can I share my Apple Music subscription with family members using my Apple ID ?
Can I Share My Apple Music Subscription with Family Members Using My Apple ID? You can share your Apple Music subscription with family members using your Apple ID through the Apple Music Family Plan. This plan allows up to six people to enjoy all the benefits of an individual subscription for a discounted monthly rate. To share your subscription, you need to subscribe to the Family Plan and invite family members to join your plan. Once they accept the invitation, they can start enjoying all the benefits of Apple Music, including access to millions of songs, playlists, and more. Sharing your subscription with family members saves money compared to purchasing individual subscriptions for each person.

Is Apple Music available on Android devices ?
Apple Music is a popular music streaming service by Apple Inc., and it's not exclusive to iOS devices. It's also available for Android users. The availability of Apple Music on Android devices allows users to download the app from the Google Play Store and enjoy all the features that come with a subscription. To download the Apple Music app on an Android device, users need to open the Google Play Store app, search for "Apple Music" in the search bar, select the official Apple Music app from the search results, and click on the "Install" button to download and install the app on their device. Once downloaded and installed, users can start using the app right away and enjoy features such as music streaming, radio stations, playlists, sync across devices, and offline listening.

Is Apple Pay safe to use ?
Apple Pay is a secure payment technology that employs multiple security layers to protect user information. Its safety features include device-specific numbers, unique transaction codes, and secure element chips. Apple Pay also emphasizes privacy protection by abstracting actual payment information from transactions. The service supports a wide range of devices and is easy to set up. It is widely accepted in both physical and online locations. Additionally, Apple Pay collaborates with numerous financial institutions worldwide, further enhancing its accessibility and security. Overall, Apple Pay is a reliable and secure digital payment solution.

How do I cancel my Apple Music subscription ?
This guide explains how to cancel your Apple Music subscription. The steps include opening the Settings app, tapping on your name, going to Subscriptions, selecting your Apple Music subscription, canceling the subscription, confirming cancellation, and checking for any remaining time. Canceling your subscription does not immediately stop your access to the service; you can continue using it until the end of your current billing cycle.

Does Apple Music have a free trial period ?
Apple Music offers a three-month free trial for new users, allowing them to explore its vast library and personalized recommendations without any charges. To sign up, users need to open the Music app or iTunes, click on the "Try it free" button, create an Apple ID (if needed), enter payment information, and start enjoying the service. It's important to cancel the subscription before the trial ends to avoid being charged.

How do I use Apple Pay in stores ?
Apple Pay is a convenient and secure way to make purchases using your Apple device. Here's how you can use it in stores: 1. Set up Apple Pay on your device by opening the Wallet app, tapping the plus sign, and following the prompts to add a new card. 2. Use Apple Pay at the checkout by double-clicking the side button on your iPhone, holding it near the contactless reader until you see Done and a checkmark, and entering your PIN or signing your name if prompted. 3. Confirm your payment by looking for a confirmation on your device. 4. Keep your receipt in case you need to return or exchange an item.

Can I use Apple Pay for online purchases ?
Apple Pay is a mobile payment and digital wallet service that allows users to make secure and convenient payments using their Apple devices. It works by transmitting payment information between the user's device and the merchant's payment terminal using near-field communication (NFC) technology. Using Apple Pay for online purchases offers several benefits, including convenience, security, speed, and integration with other Apple services. To set up Apple Pay for online purchases, users must add their credit or debit card details to the Wallet app on their iPhone or iPad, choose a default card, look for the Apple Pay button at checkout when shopping online, confirm their payment using Touch ID or Face ID, and wait for confirmation from the merchant. If issues arise while using Apple Pay for online purchases, users can check their device compatibility, update their billing and shipping information, or contact customer support for assistance.