Building your own computer hardware from scratch is a rewarding experience that requires careful planning, component selection, assembly, operating system installation, and maintenance. Start by determining your budget, performance goals, and compatibility of components. Choose essential parts like the CPU, motherboard, memory, storage, graphics card, power supply, and case. Assemble the computer by installing the CPU, RAM, motherboard, storage devices, graphics card, connecting cables, and closing up the case. Install an operating system like Windows, macOS, or Linux based on your needs. Finally, troubleshoot any issues and maintain your computer's performance through regular software updates, file cleanups, temperature monitoring, and data backups.
Can I Build My Own Computer Hardware from Scratch?
Building your own computer hardware from scratch is a challenging but rewarding experience. It requires a deep understanding of computer components and their functions, as well as the ability to assemble them correctly. In this guide, we will explore the steps involved in building your own computer hardware from scratch.
1. Plan Your Build
Before starting any project, it's essential to plan your build carefully. Consider the following factors:
- Budget: Determine how much money you want to spend on your build. This will help you choose the right components for your budget.
- Performance Goals: Decide what you want your computer to do. Do you want it for gaming, video editing, or general use? This will help you select the appropriate components.
- Compatibility: Ensure that all the components you choose are compatible with each other. Check the manufacturer's specifications and reviews before making any purchases.
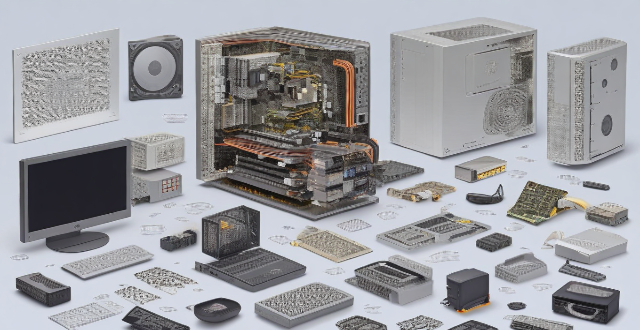
2. Choose Your Components
Once you have planned your build, it's time to choose your components. Here are some key components you will need:
- Processor (CPU): The brain of your computer. Choose one based on your performance goals and budget.
- Motherboard: The main circuit board that connects all the components together. Ensure it's compatible with your CPU and has enough slots for your memory and expansion cards.
- Memory (RAM): Random Access Memory is crucial for multitasking and running programs smoothly. Choose the appropriate amount based on your needs.
- Storage: Hard drives or solid-state drives (SSDs) store your data and programs. Choose one based on your storage requirements and budget.
- Graphics Card: If you plan on gaming or using graphics-intensive applications, a dedicated graphics card is essential. Otherwise, integrated graphics on your CPU may suffice.
- Power Supply: Provides power to all the components in your system. Choose one with enough wattage to support your build and has the necessary connectors for your components.
- Case: Houses all your components and provides cooling for your system. Choose one based on your aesthetic preferences and compatibility with your motherboard.
3. Assemble Your Computer
Now that you have all the necessary components, it's time to start assembling your computer. Follow these steps:
1. Prepare Your Workspace: Clear a clean, flat surface and ensure good lighting.
2. Install the CPU: Carefully place the CPU into the socket on the motherboard and secure it with the provided locking mechanism.
3. Install the RAM: Open the clips on the RAM slots and gently insert the RAM modules until they click into place.
4. Install the Motherboard: Place the motherboard into the case and secure it with screws.
5. Install the Storage Devices: Connect your hard drives or SSDs to the appropriate ports on the motherboard and secure them in the case.
6. Install the Graphics Card: Insert the graphics card into the PCIe slot on the motherboard and secure it with a screw.
7. Connect Cables: Connect all necessary cables from your power supply to your components, including the motherboard, storage devices, and graphics card.
8. Close Up the Case: Once everything is connected, close up the case and ensure all cables are tidy and out of the way of fans or other components.
4. Install an Operating System
With your computer assembled, it's time to install an operating system (OS). Here are some popular options:
- Windows: A widely used OS known for its compatibility and user-friendly interface.
- macOS: An OS exclusive to Apple computers, known for its simplicity and security features.
- Linux: A free and open-source OS known for its customizability and performance.
Choose an OS based on your needs and follow the installation process provided by the manufacturer.
5. Troubleshoot and Maintain Your Computer
After installing the OS, test your computer thoroughly to ensure everything is working correctly. If you encounter any issues, refer to online resources or seek assistance from a professional.
To maintain your computer's performance over time, perform regular tasks such as:
- Update Software: Keep your operating system and applications up to date with the latest patches and updates.
- Clean Up Files: Delete unnecessary files and uninstall unused programs to free up space on your storage devices.
- Monitor Temperatures: Use monitoring software to track your computer's temperatures and ensure proper cooling.
- Backup Data: Regularly backup important data to an external storage device or cloud service to prevent data loss in case of hardware failure.